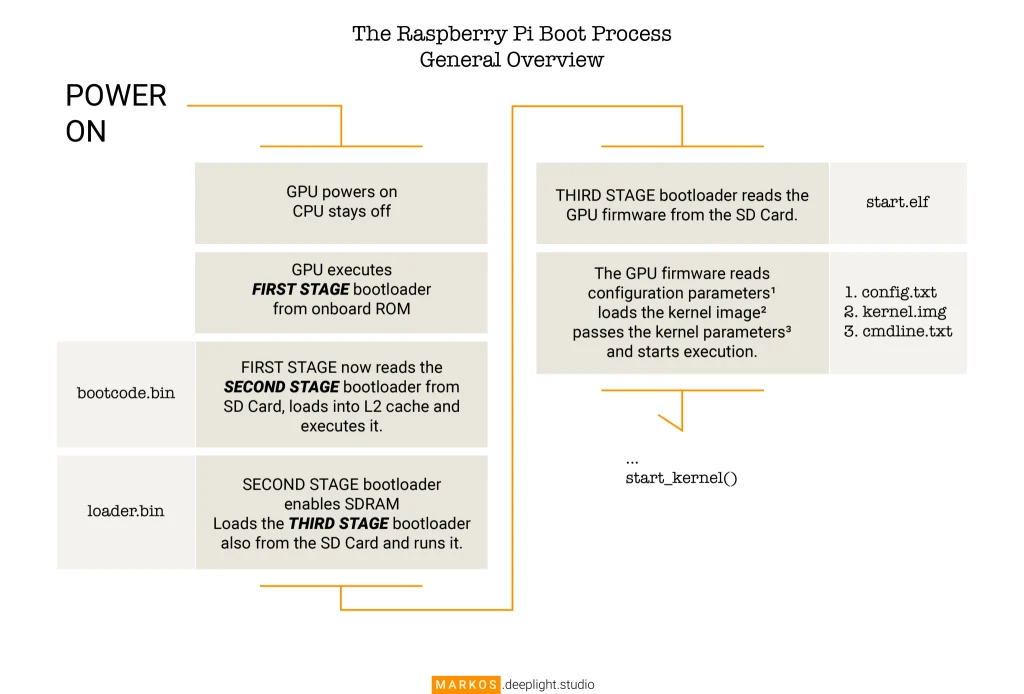
I am using the Raspberry Pi Zero W for my test host machine for these early builds of MARKOS, so I have to model after it’s particular boot process, and this post describes what that is.
To start we need 3 key binary files before we load the kernel, namely bootcode.bin, loader.bin and start.elf, and these are available on the Raspberry Pi github account.

These 3 binary blobs run boot code and load firmware onto the SoC. We don’t ever get to see inside these, and they must be present on the SD Card to allow the device to boot. The boot process finishes by loading the kernel and beginning execution. You can find a more technical description of the RPi boot flow process here.
The kernel is responsible for initializing the remaining essential hardware and interrupts, begins the idle process, scheduler, and init processes. The init process in our case is going to be systemd which will run as process 1, and will now be responsible for launching all of the other processes for the system. This is the point where our login screen, window manager and shell would start. For my first test run this is going to run a test application that writes graphics directly to the framebuffer.
Side note: Splash Screen
Because of the unusual bootloader on the Pi, you cannot just configure grub to use a different splash screen at startup. I’m going to use this guide to configure plymouth to display a custom splash screen while the Kernel finishes.
I’ll report in when this is done.